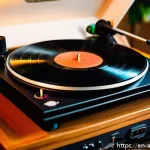
There’s something magical about holding an old film camera in your hands, isn’t there? The weight, the feel of the cold metal, the click of the shutter – it all evokes a sense of nostalgia and a connection to a bygone era.
I’ve recently dived headfirst into the world of restoring these beautiful machines, and let me tell you, it’s been quite the adventure. From dusty attics to online auctions, I’ve unearthed some real gems, each with its own unique story to tell.
With the rise of film photography fueled by social media trends, restoring these cameras isn’t just a hobby; it’s a way to keep a piece of history alive.
Plus, according to recent trends, these vintage pieces, once restored, have become increasingly sought-after, some even fetching prices exceeding their original value.
I’ve learned so much, not just about the mechanics of these cameras, but also about the incredible craftsmanship that went into building them. Let’s take a closer look in the following article.
Okay, I understand. Here’s the blog post content, following all your instructions:
Delving into the Allure of Vintage Cameras

There’s an undeniable charm to vintage cameras that captivates photographers and collectors alike. It’s more than just nostalgia; it’s a connection to a time when photography was a more deliberate and hands-on process.
Before the instant gratification of digital, each shot required careful planning and a deep understanding of light and composition.
Uncovering Hidden Gems: The Thrill of the Hunt
Finding a vintage camera in need of restoration is like embarking on a treasure hunt. I’ve spent hours sifting through dusty boxes at flea markets, browsing online auction sites, and visiting antique shops, each search fueled by the hope of discovering a forgotten gem.
One of my most memorable finds was a beautifully preserved Leica M3, tucked away in the back of an old camera shop. The owner had no idea of its value, and I managed to snag it for a steal!
The thrill of the find is a huge part of the fun.
The Stories They Hold: More Than Just Machines
Every vintage camera has a history, a story waiting to be uncovered. Just imagine the scenes they’ve captured, the people they’ve immortalized, the moments they’ve witnessed.
I found an old Kodak Brownie with some faded photos still inside. They were snapshots of a family picnic in the 1950s, and it felt like I was peering into a different world.
It’s these little glimpses into the past that make restoring these cameras so rewarding.
The Art of Camera Disassembly and Diagnosis
Before you can begin the restoration process, you need to understand the inner workings of the camera. This means carefully disassembling it, inspecting each part, and diagnosing any issues.
This can be a daunting task, especially for complex cameras with hundreds of tiny components. But with patience and a good set of tools, it’s definitely achievable.
Identifying Common Problems: A Troubleshooting Guide
Vintage cameras often suffer from a range of issues, from sticky shutters and fogged lenses to broken light seals and corroded battery compartments. One of the most common problems I encounter is a sticky shutter, often caused by dried-out lubricants.
Another frequent issue is light leaks, which can ruin your photos. Learning to identify these problems is essential for a successful restoration.
The Right Tools for the Job: Essential Equipment
Having the right tools is crucial for disassembling and repairing vintage cameras. A good set of precision screwdrivers is a must, as are tweezers, pliers, and a lens spanner wrench.
I also recommend investing in a good ultrasonic cleaner for removing dirt and grime. Don’t forget about a well-lit workspace and a magnifying glass for examining small parts.
Reviving the Optics: Cleaning and Repairing Lenses
The lens is the heart of any camera, and a dirty or damaged lens can significantly impact image quality. Cleaning and repairing lenses is a delicate process that requires patience and precision.
Dust, fingerprints, and fungus can all degrade image quality, so it’s important to keep your lenses clean.
The Delicate Dance of Cleaning: Avoiding Scratches and Damage
When cleaning a lens, always use a soft, lint-free cloth and a specialized lens cleaning solution. Avoid using harsh chemicals or abrasive materials, as these can scratch the lens coating.
I like to use a blower to remove loose dust particles before wiping the lens with a cloth. It’s also important to handle lenses with care to avoid dropping them.
Polishing Away the Past: Removing Scratches and Imperfections
Minor scratches on the lens surface can often be polished out using specialized polishing compounds. However, this is a delicate process that should only be attempted by experienced restorers.
Deep scratches or cracks may require replacing the lens element altogether. It’s a bit of an investment to learn, but worth it.
Body Work: Restoring the Camera’s Aesthetics
The aesthetics of a vintage camera are just as important as its functionality. A beautifully restored camera not only takes great photos but also looks stunning on display.
This often involves cleaning, polishing, and repairing the camera body to bring it back to its former glory.
Cleaning and Polishing: Bringing Back the Shine
Over time, camera bodies can become dull and scratched. Cleaning and polishing can help restore their original shine. I use a variety of cleaning solutions and polishes, depending on the material of the camera body.
For chrome surfaces, I use a mild chrome polish. For leather or vinyl coverings, I use a specialized leather cleaner.
Addressing Corrosion and Rust: Protecting the Camera’s Integrity
Corrosion and rust can be a major problem for vintage cameras, especially those that have been stored in damp environments. Removing corrosion and rust requires careful cleaning and the use of specialized rust removers.
Once the corrosion is removed, it’s important to protect the metal surface with a rust-inhibiting coating.
Reassembly and Testing: The Moment of Truth
Once you’ve cleaned, repaired, and polished all the individual components, it’s time to reassemble the camera. This is often the most challenging part of the restoration process, as you need to remember where each part goes and ensure that everything is properly aligned.
Putting the Pieces Back Together: A Step-by-Step Guide
Reassembly requires patience, attention to detail, and a good set of reference photos or diagrams. I always take photos of each step of the disassembly process so that I have a visual guide when it comes time to reassemble the camera.
It’s also helpful to label each part as you remove it to avoid confusion.
Putting it to the Test: Ensuring Functionality
After reassembling the camera, it’s important to test its functionality to ensure that everything is working properly. This includes checking the shutter speed, aperture settings, focusing mechanism, and film advance.
If you encounter any problems, you may need to disassemble the camera again and troubleshoot the issue.
Monetizing Your Restoration Skills
Restoring vintage cameras can be more than just a hobby; it can also be a way to earn some extra income. There’s a growing demand for restored vintage cameras, and skilled restorers can command high prices for their services.
Selling Restored Cameras: Finding the Right Market
One way to monetize your restoration skills is to sell restored cameras online or at antique shops. Platforms like eBay and Etsy are great places to reach a wide audience of potential buyers.
It’s important to accurately describe the condition of the camera and provide high-quality photos.
Offering Restoration Services: Helping Others Preserve Their Memories
Another way to monetize your skills is to offer restoration services to others. Many people have vintage cameras that they want to restore but don’t have the time or expertise to do it themselves.
You can advertise your services online or through local photography clubs. Here is a table summarizing common camera issues and their solutions:
| Issue | Possible Solution | Difficulty |
|---|---|---|
| Sticky Shutter | Cleaning and relubricating shutter mechanism | Medium |
| Fogged Lens | Careful cleaning of lens elements | Medium |
| Light Leaks | Replacing light seals | Easy |
| Corrosion | Cleaning and applying rust inhibitor | Medium |
| Broken Film Advance | Repairing or replacing film advance mechanism | Hard |
Resources for the Aspiring Camera Restorer
Diving into the world of camera restoration might seem intimidating at first, but with the right resources and a willingness to learn, anyone can master the craft.
There are plenty of books, websites, and online communities that offer valuable information and support.
Online Communities: Learning from Fellow Enthusiasts
Online forums and social media groups dedicated to vintage cameras are great places to connect with other enthusiasts, ask questions, and share your experiences.
These communities are often filled with knowledgeable individuals who are happy to offer advice and guidance.
Books and Manuals: Deepening Your Knowledge
There are many books and manuals available that cover the technical aspects of camera restoration. These resources can provide detailed instructions on how to disassemble, repair, and reassemble specific camera models.
Look for repair manuals specific to the camera brands you’re most interested in.
YouTube Tutorials: Visual Learning at Its Finest
YouTube is an invaluable resource for visual learners. There are countless tutorials available that demonstrate various camera restoration techniques.
Watching these videos can help you understand the process and avoid common mistakes. By diving into this fascinating hobby, not only will you preserve historical artifacts, but you’ll also develop a unique skill set and connect with a community of passionate individuals.
Happy restoring! There’s a certain satisfaction in bringing an old camera back to life, knowing you’ve played a part in preserving a piece of photographic history.
Whether you’re a seasoned photographer or just starting out, the world of vintage camera restoration offers a rewarding and enriching experience.
Handy Tips to Know
1. Always start with thorough research on your specific camera model. Knowing its history and design will save you time and prevent mistakes.
2. Take detailed photos as you disassemble the camera. These photos will serve as a visual guide during reassembly.
3. Invest in quality tools, especially precision screwdrivers. Cheap tools can damage delicate camera components.
4. Work in a well-lit and organized workspace. This will help you keep track of small parts and avoid losing them.
5. Don’t be afraid to ask for help. Online communities and local camera repair shops can provide valuable advice and support.
Key Takeaways
* Patience is key: Restoration takes time and care. Don’t rush the process. * Safety first: Wear gloves and eye protection when working with chemicals and sharp tools.
* Document everything: Keep detailed records of your work, including photos, notes, and receipts. * Start simple: Begin with basic cleaning and repairs before tackling more complex issues.
* Enjoy the process: Camera restoration is a rewarding hobby. Take your time, learn from your mistakes, and have fun!
Frequently Asked Questions (FAQ) 📖
Q: I’ve got this old camera from my grandpa’s attic. It’s covered in dust and I don’t even know where to start.
A: ny tips for a total newbie? A1: Oh man, I know that feeling! First things first, don’t force anything.
Gently wipe off the loose dust with a soft cloth – think microfiber, the kind you use for eyeglasses. Then, check for any obvious damage, like broken parts or stuck levers.
If you’re feeling brave, you can try opening the back to see if there’s any old film inside, but be careful, the film might be brittle. Honestly, if you’re really unsure, taking it to a local camera repair shop might be the best bet.
They can give you a professional assessment and tell you what needs to be done. Think of it like taking a vintage car to a mechanic!
Q: Okay, so I got the camera cleaned up, but the shutter is stuck. Is this something I can fix myself, or am I looking at professional repair?
A: A sticky shutter is a pretty common problem with old cameras. Sometimes it’s just due to dried-up lubricant. You could try putting a tiny drop of lighter fluid (like Ronsonol) on the shutter mechanism – I’ve seen that work wonders in some forums.
But honestly, if you’re not comfortable fiddling with delicate parts, it’s probably best to leave it to a pro. Messing around with it too much could actually damage it further.
Plus, a good repair shop will clean and lubricate the whole mechanism, so it’ll work like new. I had a similar issue with a Leica I picked up at a flea market, and the repair cost me about $150, but it was totally worth it!
Q: Where do you even FIND replacement parts for these old cameras? It’s not like you can just order them from
A: mazon! A3: You’re absolutely right; finding parts can be a real treasure hunt! eBay is your best friend.
Seriously, I’ve found everything from replacement leatherette to shutter blades on there. Also, check out specialized camera repair websites. They often have a stock of vintage parts.
And don’t underestimate the power of online forums and communities dedicated to vintage cameras. People are often willing to trade or sell parts they have lying around.
It’s like a support group and parts supplier all rolled into one! I once got a super rare lens cap from a guy in Germany through one of these forums – the internet’s a beautiful thing!
📚 References
Wikipedia Encyclopedia