Hey there, photography lovers! In a world that’s constantly snapping and sharing instantly on our phones, there’s been this amazing shift back to something a bit more deliberate, a lot more charming: film photography.
Honestly, when I first picked up an old analog camera, I felt a mix of excitement and a tiny bit of dread – it seemed so complicated compared to digital!
But oh, the magic of it. There’s just nothing quite like the anticipation of developing a roll, the unique grain, and that tangible feel of a physical negative.
It’s not just about taking a picture; it’s about slowing down, really seeing your shot, and savoring the entire creative process. If you’ve been dreaming of diving into the beautiful, slightly mysterious world of film, or perhaps you’ve got an old beauty gathering dust, you’re in for a treat.
This isn’t just a trend; it’s a mindful way to connect with your art. Let’s explore how to get started with your film camera and capture some truly unforgettable moments.
Hunting for Your Analog Soulmate: Choosing Your First Film Camera

You know, when I first ventured into film photography, the sheer number of camera models out there felt overwhelming. It was like walking into a massive vintage shop, not knowing where to begin.
But honestly, that’s half the fun! Finding your first film camera isn’t just about buying a piece of equipment; it’s about connecting with a bit of history, finding a tool that resonates with your creative spirit.
My journey started with a dusty old Pentax K1000 my uncle had tucked away in his attic, and let me tell you, that simple, mechanical beast taught me more about photography than any digital manual ever could.
Don’t rush the process; enjoy the hunt, because the camera you choose will become an extension of your artistic vision. Think about what kind of photography you’re drawn to – portraits, landscapes, street scenes – as this can often guide you towards a camera system that excels in those areas.
It’s a wonderful feeling to hold a camera that’s seen decades of stories and is now ready to help you tell yours. The tactile experience, the weight of it in your hands, the satisfying click of the shutter – these are all part of the charm that digital often misses.
The Thrill of the Find: Where to Discover Hidden Gems
Forget the sterile online marketplaces for a moment, although they certainly have their place. My favorite way to find a camera is through local avenues.
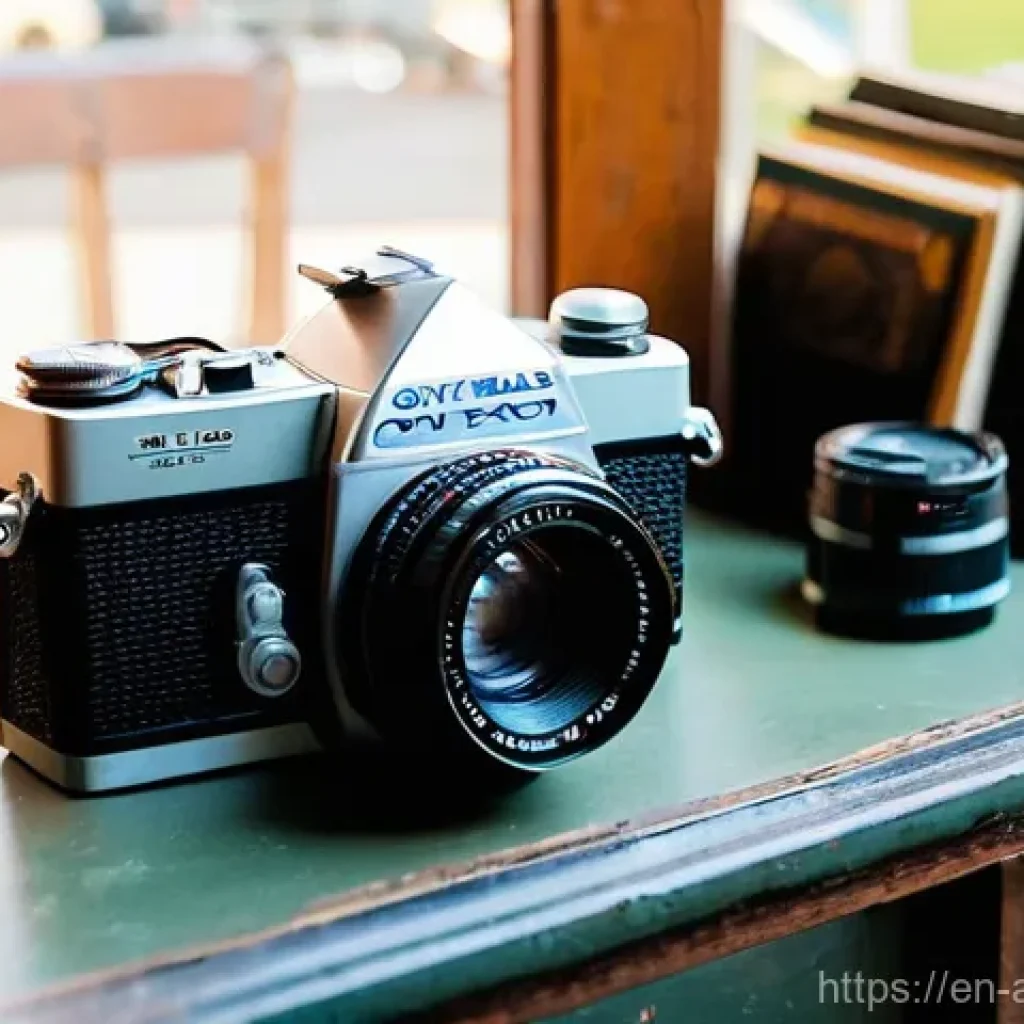
Think antique shops, charity stores, garage sales, and even local camera repair shops – sometimes they have trade-ins or cameras they’ve refurbished. I once stumbled upon a gorgeous Olympus OM-1 at a tiny flea market for a steal, and it quickly became one of my go-to cameras.
There’s something incredibly satisfying about unearthing a forgotten treasure. Of course, online marketplaces like eBay and dedicated vintage camera stores (both online and brick-and-mortar) offer a broader selection, but be sure to check seller reviews diligently.
You want a seller with a strong reputation for accurately describing their items. Forums and local photography groups on social media are also fantastic resources; often, fellow enthusiasts are selling gear, and you might even get a chance to try it out before you buy.
Remember, patience is key – the perfect camera often appears when you least expect it.
Decoding the Specs: What Truly Matters for Beginners
When you’re just starting, the endless array of specifications can be a bit much. Don’t get bogged down trying to understand every single technical term.
For your first film camera, simplicity is often your best friend. Look for a fully mechanical camera, or at least one with a manual mode that allows you to control aperture, shutter speed, and focus.
Cameras like the aforementioned Pentax K1000, Nikon FM2, Canon AE-1, or Olympus OM-1 are legendary for a reason – they’re robust, intuitive, and have fantastic ecosystems of lenses.
Pay attention to the condition of the light seals (these can degrade over time, leading to light leaks on your film) and the shutter. Does it fire at all speeds?
Is the lens free of fungus or haze? These are the real deal-breakers. A working light meter is a bonus, but honestly, learning to meter manually with an app on your phone or an external light meter is a crucial skill that will elevate your photography regardless.
My first camera’s meter was dead, and that forced me to learn exposure from the ground up – best thing that ever happened to my understanding of light!
Lenses: The Soul Behind the Shot
While the camera body is important, I’ve found that the lens often dictates the look and feel of your images more than anything else. For a beginner, a ‘nifty fifty’ (a 50mm prime lens, typically f/1.8 or f/1.4) is an absolute must-have.
They’re usually affordable, incredibly sharp, and teach you how to see the world without the crutch of zoom. The fixed focal length encourages you to move your feet and think about composition more deliberately.
Plus, their wide apertures are fantastic for low-light situations and creating that beautiful, creamy bokeh that film photographers adore. My first 50mm lens opened up a whole new world of portraiture for me, allowing me to isolate subjects with a shallow depth of field in a way my phone camera just couldn’t replicate.
As you grow, you might explore wider angles for landscapes or longer telephotos for wildlife, but start with a solid prime. It forces you to get creative within limitations, which is a fantastic way to develop your photographic eye.
Loading Up and Letting Go: Mastering Your First Roll of Film
Okay, so you’ve got your camera, maybe a sweet 50mm lens, and now you’re holding your first roll of film. That feeling of anticipation, right? It’s different from digital, where you just pop in an SD card.
Loading film feels like a ritual, a commitment to the 24 or 36 frames ahead. The first time I loaded a roll, I fumbled a bit, worried I’d expose the whole thing before I even started shooting.
But once that leader catches and the rewind crank tightens up, you know you’re ready. This is where the magic really begins. You’re not just taking pictures; you’re crafting moments, one frame at a time, knowing each click is a physical impression on that strip of cellulose.
It’s a mindful process that makes you slow down, consider your shot, and truly engage with the scene in front of you. Embrace that feeling of deliberation, because it’s what makes film photography so uniquely rewarding.
The Wonderful World of Film Stocks: Picking Your Palette
This is where the real fun starts, because film isn’t just film – it’s a universe of textures, colors, and moods. Each film stock has its own personality, its unique way of interpreting light and color.
For beginners, I always recommend starting with a versatile, relatively forgiving film like Kodak Gold 200 or FujiFilm C200. They’re affordable, widely available, and produce lovely, natural colors.
Once you’re comfortable, you can branch out. Want punchy, vibrant colors with a classic look? Try Kodak Portra.
Craving that dreamy, pastel aesthetic? FujiFilm Superia might be your jam. Black and white?
Ilford HP5 Plus or Kodak Tri-X are legendary for their timeless appeal and beautiful grain. Don’t be afraid to experiment! I still remember my first roll of Portra 400 – the way it rendered skin tones was just breathtaking, instantly making me a fan.
Think of film stocks as different paints on an artist’s palette; each one offers a distinct flavor to your visual storytelling.
Exposure Essentials: Nailing the Light Without a Screen
This is often the biggest hurdle for digital photographers transitioning to film – no instant feedback! You can’t just chimp your LCD screen to check if your exposure is spot on.
This forces you to truly understand the exposure triangle: aperture, shutter speed, and ISO (which is fixed by your film choice). My biggest tip? Learn the Sunny 16 rule.
It’s an old-school way of estimating correct exposure in bright sunlight without a meter, and it’s surprisingly accurate. Basically, on a sunny day, set your aperture to f/16 and your shutter speed to 1/ISO (e.g., 1/125s for ISO 100 film).
From there, you can adjust for different lighting conditions. Alternatively, use a light meter app on your phone – many are quite good. The key is to overexpose color negative film slightly (maybe half a stop to a full stop).
Film loves light, and slight overexposure can help retain shadow detail and give you richer colors, whereas underexposure tends to lead to muddy shadows and increased grain.
Trust me, learning to ‘read’ the light without digital assistance is incredibly empowering.
Composing with Care: Why Every Click Counts
With only 24 or 36 frames per roll, you quickly learn to be deliberate. This isn’t about spraying and praying; it’s about thoughtful composition. Each click of the shutter costs money, both in film and developing, so you naturally slow down and really consider what’s in your frame.
Think about leading lines, the rule of thirds, negative space, and framing. How does the light fall on your subject? Is there anything distracting in the background?
My early film days taught me immense patience. I’d spend minutes just looking through the viewfinder, moving around, waiting for the perfect moment or alignment.
It’s a wonderful exercise in mindfulness that helps you develop a stronger photographic eye. This discipline translates beautifully back to digital photography too, making you a much more intentional shooter overall.
Don’t be afraid to take your time; the best shots aren’t rushed.
The Grand Reveal: Bringing Your Images to Life
Ah, the moment of truth! After you’ve shot a roll of film, there’s that delicious period of anticipation, knowing that unique images are sitting latent on that strip of plastic, waiting to be coaxed out.
This is, hands down, my favorite part of the film photography process. It’s like unwrapping a present you made yourself, but you have no idea exactly what’s inside.
The first time I got a roll back from the lab, I remember tearing open the envelope with shaky hands, scanning the negatives with a magnifying glass, and then finally seeing my images pop up on the screen after scanning.
It’s a feeling of pure magic, a connection to the analog process that digital instant gratification just can’t replicate. You truly feel like you’ve created something tangible.
Whether you choose to develop at home or send it off to a professional lab, this step closes the loop on your creative journey and transforms light and chemistry into lasting memories.
Home Developing: A Rewarding (and Slightly Messy) Adventure
If you’re anything like me, the idea of developing your own film might seem a little intimidating at first. Trust me, it’s not as scary as it sounds, especially for black and white film.
All you really need is a dark space (a bathroom at night works wonders), a developing tank, some chemicals, and a thermometer. My first home developing setup was in my tiny apartment bathroom, and while I definitely spilled some fixer, the thrill of seeing those negatives emerge from the tank was absolutely unparalleled.
It’s an incredibly hands-on experience that deepens your understanding of the photographic process. There are tons of fantastic tutorials online, and once you get the hang of it, it becomes quite meditative.
Plus, it’s a fantastic way to save money in the long run, giving you complete control over the final look of your negatives. It’s a step that truly connects you to the history of photography, making you feel like a mad scientist in the best possible way.
Trusting the Wizards: Finding a Great Lab for Your Precious Rolls
Not everyone has the space, inclination, or time to develop film at home, and that’s perfectly fine! There are countless excellent film labs out there that do an incredible job.
The key is finding one you trust, as your precious frames are literally in their hands. Look for labs that specialize in film, have good reviews, and offer a variety of services, including scanning.
Some labs even offer different scanning options, from basic to high-resolution, which can make a big difference if you plan on making large prints. I usually prefer a lab that can provide both high-quality scans and send me my negatives back so I can archive them myself.
Ask local photographers for recommendations, check online communities, and don’t be afraid to try a few different labs until you find one whose color science and service you love.
A good lab can truly make your images sing, and their expertise is invaluable, especially when you’re just starting out and want consistent results.
Embracing the Beautifully Imperfect: The Authentic Charm of Film
One of the most captivating aspects of film photography, at least for me, is its inherent connection to imperfection. Unlike digital, where every pixel is often striving for clinical perfection, film embraces the quirks, the happy accidents, and the unique characteristics that give each image a soul.
I remember agonizing over a few light leaks on my very first roll, thinking I’d ruined the shots. But when I got the scans back, those subtle, reddish flares actually *added* to the image, giving it a nostalgic, dreamy quality I couldn’t have achieved digitally.
It taught me to let go of control a bit and appreciate the unexpected gifts that analog photography often delivers. It’s this embrace of the organic, the tactile, and the sometimes-unpredictable that makes film photography such a deeply personal and rewarding art form.
Grain, Flares, and Happy Accidents: Learning to Love the Unexpected

That distinct, textural quality you see in film photos? That’s grain, and it’s beautiful. It’s not noise; it’s the natural structure of the film emulsion, and it adds character and depth that digital sensors often struggle to replicate.
Different film stocks will have different grain structures, from fine and smooth to gritty and pronounced. Then there are light leaks and color shifts – sometimes a roll of film might get a tiny bit of light exposure it shouldn’t, or the chemicals might react in a slightly unexpected way.
Instead of seeing these as flaws, film photographers often celebrate them as unique signatures of the analog process. My favorite film photos are often the ones with a subtle light leak or a slightly off-kilter color shift that tells a story beyond the subject itself.
It’s about letting go of the need for absolute control and welcoming the serendipitous moments that only film can create.
Bridging Worlds: From Tangible Negative to Digital Share
While the physical negative is the heart of film photography, we live in a digital world, and sharing our images online is a huge part of the experience.
This is where scanning comes in. You can either purchase your own film scanner (there are fantastic options like the Epson V600 or dedicated 35mm scanners) or rely on your lab to provide high-quality digital files.
Personally, I love having my own scanner because it gives me full control over the digital output – from color correction to dust removal. It’s another layer of the creative process that allows you to interpret your negatives.
Remember, a good scan can really bring out the best in your film, preserving all that wonderful detail and tonality. Once you have your digital files, you can share them on Instagram, your blog, or even print them at home.
It’s the best of both worlds: the analog creation process combined with modern sharing capabilities.
Beyond the Point-and-Shoot: Elevating Your Analog Game
Once you’ve got a few rolls under your belt and feel comfortable with the basics, a whole new world of analog possibilities opens up. Film photography isn’t just about shooting 35mm SLRs; it’s a vast landscape of formats, techniques, and creative explorations.
I remember feeling so accomplished after my first few successful rolls, and then I saw someone’s medium format prints – the detail, the depth! It ignited a new curiosity in me, pushing me to explore beyond my initial comfort zone.
This continuous learning and experimentation are what keep the passion alive, transforming a hobby into a true art form. Don’t be afraid to venture into new territories; that’s where some of the most exciting discoveries are made.
Exploring New Horizons: Diving into Medium Format and Beyond
If you’ve been shooting 35mm, stepping into medium format is a game-changer. Cameras like the Mamiya RB67 or a Hasselblad 500 series offer much larger negatives, translating to incredible detail, smoother tonal gradings, and a unique aesthetic that’s instantly recognizable.
It’s a different rhythm of shooting – often slower, more deliberate, and definitely more expensive – but the results are truly breathtaking. I picked up a medium format TLR (twin-lens reflex) camera a few years ago, and while it took some getting used to the waist-level viewfinder, the portraits I’ve taken with it are some of my all-time favorites.
And if you’re feeling really adventurous, large format photography (think sheet film!) takes that deliberation to an extreme, offering unparalleled image quality and a profoundly meditative shooting experience.
Each format offers a unique perspective and creative challenge, pushing you to grow as a photographer.
Creative Experiments: Pushing the Boundaries of Your Film
Film photography offers a playground for experimentation. Have you ever heard of ‘cross-processing’? That’s developing slide film in C-41 (color negative) chemicals, which results in wild color shifts and high contrast – totally unpredictable and incredibly fun!
Or ‘redscale’ film, where you load the film backward to expose through the base, giving everything a warm, reddish glow. Then there are things like pushing and pulling film (underexposing or overexposing and then adjusting development times) to manipulate grain and contrast, or shooting expired film for unique color shifts and light leaks.
Don’t be afraid to try something different. Some of my most interesting and unexpected images have come from just messing around with unconventional techniques.
It’s about breaking free from the rules, seeing what happens, and embracing the happy accidents that make film so unique. The beauty of analog is that even “mistakes” can often turn into beautiful, one-of-a-kind art.
Making it Last: Sustaining Your Film Photography Passion Without Breaking the Bank
Let’s be real, film photography isn’t exactly the cheapest hobby out there, especially when you compare it to the “free” cost of digital clicks. But it doesn’t have to drain your wallet entirely!
Like any passion, there are smart ways to manage your expenses and make your film journey sustainable in the long run. When I first started, I was buying every cool-looking film stock I saw, only to realize I was burning through cash faster than I was shooting good pictures.
Learning to be strategic about what I buy and how I process has made a huge difference, allowing me to enjoy this amazing art form without constantly worrying about the budget.
It’s all about making informed choices that align with your shooting style and financial comfort.
Savvy Shopping: Smart Ways to Stock Up on Film
Film can be pricey, but there are definitely ways to get more bang for your buck. Buying in bulk is usually the smartest move – many retailers offer discounts when you purchase a brick of 5 or 10 rolls.
Keep an eye out for sales, especially around holidays. Subscribing to newsletters from your favorite film stores can alert you to deals you might otherwise miss.
Sometimes, buying a few rolls of less popular but still excellent film stocks can save you a bit, and you might even discover a new favorite! And don’t shy away from expired film, but do so cautiously.
Expired film can produce truly unique, unpredictable results, but it’s best for experimentation rather than critical projects. Always ask about how it was stored – refrigeration is key for longevity.
I’ve snagged some fantastic deals on expired Portra that produced beautiful, slightly muted colors, adding a vintage feel to my shots.
The Cost Comparison: Home Processing vs. Lab Services
This is where personal choice and commitment really come into play. Home developing, especially for black and white film, is undoubtedly more cost-effective over time.
The initial investment in a tank and chemicals pays for itself relatively quickly, and then your per-roll cost drops significantly. For color negative (C-41), home developing is also very achievable, though maintaining temperature accuracy can be a bit more fiddly.
However, sending your film to a lab offers convenience, professional-grade scanning, and consistent results without the mess or effort. Here’s a quick breakdown to help you weigh your options:
| Aspect | Home Developing | Professional Lab Services |
|---|---|---|
| Initial Cost | Moderate (tank, chemicals, thermometer) | Low (no equipment needed) |
| Per Roll Cost | Low (cost of chemicals divided by rolls) | Moderate to High (varies by lab & services) |
| Convenience | Low (requires time, setup, cleanup) | High (drop off/mail in, receive scans) |
| Control | High (full control over process) | Moderate (depends on lab options) |
| Skill Required | Moderate (learning curve) | Low (just shoot and send) |
For me, I do both! I home develop all my black and white film, and send my color rolls to a trusted lab. It’s a great balance of saving money and getting professional results where I need them.
The Value of Vintage: Why Your Gear is an Investment
Unlike digital cameras that depreciate rapidly, good film cameras and lenses tend to hold their value remarkably well, and sometimes even appreciate. That Pentax K1000 I mentioned?
I could probably sell it for more than it cost my uncle back in the day! This means that while there’s an initial investment, you’re not really “losing” money in the same way you might with a new digital body.
You can buy a camera, use it for years, and then sell it for a similar price if you decide to upgrade or try a different system. This resale value makes getting into film photography a more accessible and less financially daunting prospect than many people realize.
So, think of your film camera as an heirloom, a tool for creating art, and a pretty decent investment all rolled into one. Happy shooting, analog adventurers!
글을 마치며
And there you have it, fellow analog enthusiasts! Stepping into the world of film photography is truly a transformative experience, one that encourages you to slow down, observe, and connect with your craft on a deeply personal level. It’s not just about the gear or the technicalities; it’s about the journey of discovery, the tactile joy, and the unique stories etched onto each frame. I genuinely hope this guide inspires you to pick up a film camera and start telling your own unique visual narratives. Embrace the learning curve, savor the anticipation, and most importantly, have an absolute blast capturing the world through an analog lens. Your photographic soulmate is out there, waiting for you!
알아두면 쓸모 있는 정보
1. Don’t underestimate the power of a local camera shop! Beyond just buying gear, these hubs often have incredibly knowledgeable staff who can offer invaluable advice on everything from camera quirks to film choices. They’re also fantastic places to find used lenses, get repairs done, and even meet other local film photographers. I’ve spent countless hours just chatting with the folks at my local shop, soaking up their wisdom, and it’s truly enriched my understanding and love for the craft. Support them, and they’ll support your passion!
2. Join online film photography communities. Whether it’s Reddit, Facebook groups, or dedicated forums, these communities are treasure troves of information, inspiration, and peer support. You can ask questions without feeling silly, share your work, get feedback, and connect with people who share your passion from all over the globe. I’ve learned so much about obscure film stocks and developing techniques just by lurking and occasionally asking for advice in these groups. It’s like having a worldwide network of mentors and friends at your fingertips.
3. Invest in good film storage. Once you get your developed negatives back, don’t just toss them in a drawer! Proper storage in archival sleeves and binders will protect them from dust, scratches, and environmental damage for decades to come. Think of your negatives as your original masterpieces; they’re the tangible link to your images. I’ve heard too many horror stories of cherished negatives getting ruined, and believe me, it’s heartbreaking. A small investment now will save you a lot of grief (and potentially re-scanning costs) down the line.
4. Experiment with different scanning methods. While lab scans are convenient, exploring home scanning (if you have the equipment) or even ‘digitizing’ your negatives with a digital camera and a macro lens can offer incredible control and unique results. Each method has its own strengths and weaknesses, affecting sharpness, color rendition, and dynamic range. I spent ages perfecting my home scanning workflow, and it completely transformed how I saw and processed my images, allowing me to bring out details and tones that default lab scans sometimes missed. Don’t be afraid to try different approaches to find what works best for your aesthetic.
5. Embrace the journey, not just the destination. Film photography isn’t always about perfect, clinically sharp images. It’s about the process, the anticipation, and the beautiful imperfections that make each photograph unique. Don’t get discouraged by ‘bad’ rolls or unexpected results. Every frame, every roll, every developing session is a learning experience. I remember my first few rolls were a mixed bag, but those “failures” taught me more than any textbook could. It’s a continuous adventure of growth and self-expression, so enjoy every single step!
중요 사항 정리
Embarking on your film photography journey is an incredibly rewarding endeavor that prioritizes deliberate creation and tangible results. To truly enjoy and excel in this art form, remember to prioritize simplicity when choosing your first camera, opting for robust, mechanical bodies like the Pentax K1000 or Canon AE-1, coupled with a versatile ‘nifty fifty’ lens to hone your compositional eye. Understanding the exposure triangle without instant feedback is a core skill, so familiarize yourself with manual metering or the Sunny 16 rule, and don’t be afraid to slightly overexpose color negative film for richer results. Crucially, embrace the unique characteristics of each film stock, treating them as different palettes for your artistic vision, and always store your developed negatives properly. Whether you choose home developing for cost savings and control or rely on a trusted professional lab for convenience and consistent quality, cherish the anticipation and the grand reveal. Finally, remember that film photography celebrates imperfections, from grain to light leaks, encouraging a mindful approach that transforms every click into a valuable, tangible memory and making your gear a lasting investment rather than a fleeting purchase. It’s a journey of continuous learning and artistic expression, so immerse yourself fully in the analog magic!
Frequently Asked Questions (FAQ) 📖
Q: What’s the best film camera to start with if I’m a complete beginner, and I want something that’s not too complicated?
A: Oh, this is such a fantastic question, and one I get all the time! When I first dipped my toes into film, I was totally overwhelmed by all the options out there.
My best advice for beginners? Start with a simple 35mm camera, hands down. They’re usually super portable, relatively affordable, and widely available, which is a huge plus because film for them is easy to find too.
You really don’t need the most expensive or feature-packed model to start making magic. I’ve found that entry-level SLRs like the Canon AE-1 Program or the Pentax K1000 are often recommended and for good reason—they offer a good balance of automatic features to help you get going, but also let you experiment with manual controls as you get more confident.
If you want something even simpler, a point-and-shoot camera is brilliant. Think Kodak Ektar H35N or Canon Sure Shot series; they literally let you just point and shoot, making it incredibly easy to jump right in and focus on composition without getting bogged down in technical settings.
I even gave my young daughters some old Canon Sure Shots, and the photos they took were just astonishing! The key is finding something that feels good in your hands and doesn’t intimidate you, so you can truly enjoy the learning process.
Q: Choosing film seems like a maze with all the different numbers and types! How do I pick the right film for my shots?
A: You are so right, it can feel like stepping into a whole new language, can’t it? When I first started, I just grabbed whatever looked cool, and let’s just say my results were…
interesting! The most important thing to wrap your head around is the ISO (or ASA) number on the film box; this tells you how sensitive the film is to light.
For bright, sunny outdoor shots, a lower ISO like 100 or 200 is your best friend because it gives you fine grain and sharp results. Think Kodak Portra 160 or FujiFilm Superia for lovely colors, or Ilford FP4 for classic black and white.
If you’re heading indoors, or it’s a cloudy day, you’ll want a higher ISO film, like 400 or even 800, to capture enough light without getting blurry shots from slow shutter speeds.
Kodak Portra 400 is super versatile, and Ilford HP5 Plus is fantastic for a punchy black and white look. Beyond ISO, you’ll choose between color and black and white, and for beginners, I’d say stick to one or two color negative films first, like Portra or Ultramax, as they are very forgiving with exposure.
Don’t be afraid to experiment after your first few rolls—that’s where the real fun begins and you’ll find what unique look you love most!
Q: Okay, I’ve shot my first roll of film! Now what? What are my options for getting it developed and seeing my photos?
A: That feeling of finishing your first roll is such a thrill, isn’t it? It’s like unwrapping a present! The next step, getting it developed, is where the magic truly unfolds.
You’ve got a few main paths you can take, and each has its own charm. Most people start by sending their film to a professional lab or dropping it off at a local camera shop that offers developing services.
This is super convenient, and they handle all the chemicals and technical bits. You can usually choose to get prints, digital scans (so you can share them online, yay!), or just your negatives back.
Prices typically range from $10 to $20 per roll for 35mm color film development, with extra costs for scans or prints. Online labs like The Darkroom or Indie Film Lab are also popular, especially if you don’t have a local option, and some even offer mailer services to make it easy.
Now, for the adventurous souls, developing film at home is a super rewarding experience! I remember the intense satisfaction of seeing my first negatives appear in the developer – pure magic!
It requires a bit of an initial investment in a developing tank, reels, and chemicals, and is often recommended to start with black and white film as it’s a bit simpler than color.
Whichever route you pick, the anticipation of seeing those images for the first time is truly what makes film photography so special.